How to install a fence?
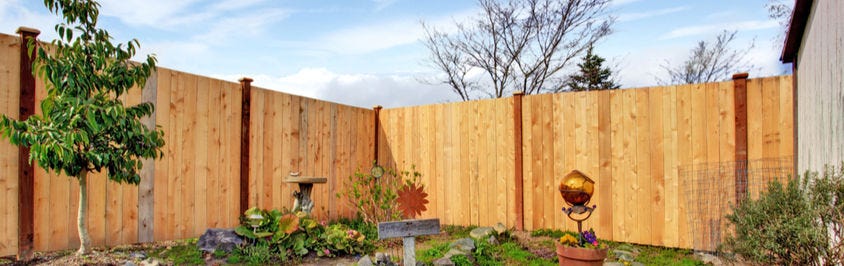
Fencing your garden has become a popular option for those looking to enjoy their outdoor living space privately and can also enhance the aesthetics of your contemporary garden. Here at Lawsons we have a great range of fencing supplies including panels, posts, gravel boards and essential tools you’ll need to put the fence up. However, installing a wooden fence can be quite a challenging task, so why not read our fence installation guide and enjoy your all-new garden fence.
Important advice to consider before installing your new fence:
Have you consulted your neighbour?
Installing a new fence can be a common difference for neighbours as it concerns the boundary between their properties, be clear on whose responsibility it is to replace and maintain a fence. You can find out by enquiring with the HM Land Registry.
Preparation - Organise the materials and tools you will need
What materials you’ll need:
- Panels
- Posts
- Wall Plate (if required)
- Gravel Board
- Cleats (if required)
- Postmix
- 65mm Galvanised nails (if required)
- Post Caps (if required)
What tools you’ll need:
- Saw
- Hammer
- Spade
- Watering can full of water
- String Line
- Spirit Level
- Old bit of scrap timber about 2m
Top Tips
What type of fencing is most suitable for the job?
When starting your project, it is best to consider the most suitable type of fencing for the job. There are many different types of fencing and Lawsons have fencing experts in their stores and online who are always happy to help and advise you.
Calculate your panels & posts:
All fence panels are 1.83m (6ft) wide so calculate how many you need based on this and also consider the sizes of the posts being used into every calculation. A good idea may be to start any fence coming away from the house continuing down the garden in full bays. This is so any cut panels will be hidden as much as possible in the furthest point of the garden.
REMEMBER DO NOT install posts in the fence line before the panels. You need to build the fence line 1 panel and 1 post at a time. You will not get the post straight or the holes in the right places otherwise.
Installation of Fence:
This process requires a minimum of 2 people to carry out this project.
- You first need to mark a fence line. This is where you use the string line with pegs from the starting to the finishing point to ensure you keep the fence line straight. Make sure the entire line is a clear of obstructions and excavate the ground as much as possible. The more you do now, the easier installation will be.
- You will need to either install a) Wall plate if your fence is coming off the house or b) Post if it is a fence line separate from the house.
- The wall plate is a piece of timber 100x50mm the same length as the height of the fence. This is what you need to use to start your fence from a wall of a house. No need to attach a 100x100mm post or concrete slotted post to the brickwork. Just a wall plate with suitable fixings. Then attach the timber or metal cleat to the wall plate. Proceed to point 4.
- If you already have an existing post you have a head start but if you are installing a new post ensure the post is long enough to allow a minimum of 600mm in the ground and to compensate for any undulation in the ground. You then need to dig the hole a minimum of 600mm down to give adequate depth for the post. You could attach the timber or metal cleat 600mm up from the bottom of the post to help you as a depth gauge for each post (cleats are not used on concrete posts)
- Place your post in the newly dug hole and then fill the hole with postmix following the guidelines for its correct use applying water as required. Tamper down the mix to compact it, then using a level to ensure it is straight, simultaneously “shore” up the post with the scrap piece of timber until the postmix has set hard. Setting times vary between manufacturer.
- When the postmix has set hard (if installing a post) you can attach a gravel board to the cleat already attached to the post or wall plate. If you are installing concrete slotted posts cleats would not be used. Use the level with the string line to guide you make sure the gravel board is both level and straight.
- Now you have an idea where the next post needs to go, dig the next hole repeating point 2b.
- With a helper lift the panel into place above the gravel board without applying too much weight to the gravel board until it is properly fixed into place. The panel will help you get the next post levels correct.
- Ask your helper to hold the panel in place whilst you install the next post in the line following points 3.
- Ensure the panel is straight with a level before fixing the panels to the posts with 65mm galvanised nails. Nails are not required if using concrete posts.
- Repeats steps 2 – 8 until the final post is in place.
We hope our step-by-step fence installation guide is simple to use and follow through, just remember that whichever style you choose your fence should last for many years and to trust all your fencing supplies with Lawsons.
Download our wooden fence installation guide here.