A retaining wall is used for supporting soil found at different levels or to keep soil on a slope that it wouldn’t normally keep to. The most common ones you’ll have seen in public are large walls that cover cliff faces and ones used in large structures built against roads.
In a garden, a retaining wall can add a whole new area to your space; even if you have a small garden, adding a retaining wall can make your space look even bigger and more usable.
So how can you add one into your home? Follow these steps to begin building one in your garden!
Materials
First of all, you’ll need to collect the materials and measure out the space you’ll want to make a retaining wall. We recommend concrete paving blocks - these can be of any size and shape you desire, and we have a huge variety of suitable bricks available in our brick centre.
You’ll also need a supply of adhesive to keep the bricks sticking together as you lay them. Mortar or cement will also do the trick if you’re looking to lay and pave out a more permanent fixture.
1. Ensure there’s a flat surface to work with
It’s much easier to work with a flat surface than fiddle with awkward positioning in the ground. If possible, find a flat and completely level surface to work with. Alternatively, you can lay down a level of concrete and flatten down to start with an entirely smooth surface.
2. Begin laying down the paving blocks
The first three small layers can be applied in one day before being left to cure for a few days. Lay them down and ensure you’re sticking to the laid-out route of your retaining wall - whether you’re going for a curved effect or having the bricks laid straight upwards. You should then leave this to preserve for 5 - 7 days to make sure it’s stable and in one place.
3. Lay down the remainder of your bricks
Now that you have a fully cured base you can now move to laying the next few layers of your retaining wall. This is all down to your personal preference and how you’ve laid out your plans for the wall, and it’s also dependent on how many hours a day you’ll spend building the wall. It can take a while to put together on your own!
When a few layers are down you can now add alternating block shapes to make sure the joints don’t line up between the layers, making your structure stronger.
4. Fill any gaps in with gravel
The surrounds of your wall can be filled with gravel, so it doesn’t stick out too much in the garden and appears more natural. This also adds a smaller barrier between the back of the wall and what’s holding the retaining wall in place, be in a raised garden or a set of stairs to your back garden door.
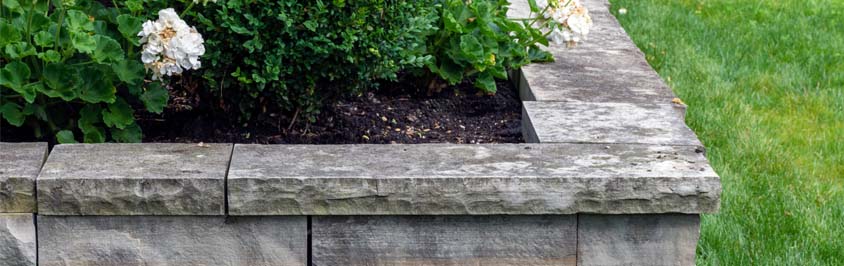
5. Add cap pieces to finish your wall
Cap pieces are essentially larger and flat slabs to add to the top of your wall so it’s easier to sit on, can add plants to the top and looks more presentable. If you’re using a curved wall then this may take some time to put together, as you’ll need to angle each brick individually.
Once you’ve laid the top layer, let the enter wall cure for a few days before putting anything particularly heavy on them. After a week you’ll be able to decorate around the retained wall to your own desires.
A retaining wall can be a lot of hard work, but it adds heaps of character to your garden, improves the space and, if you’re looking for a challenge, it allows you to redesign how you see your backyard. Why not try something new in your garden this year?